
Ticket Tracker
Set your SLAs
Premium
What you'll do
Set your own targets for how fast tickets are assigned, answered and resolved, counted in your business hours.
Steps
Set your targets
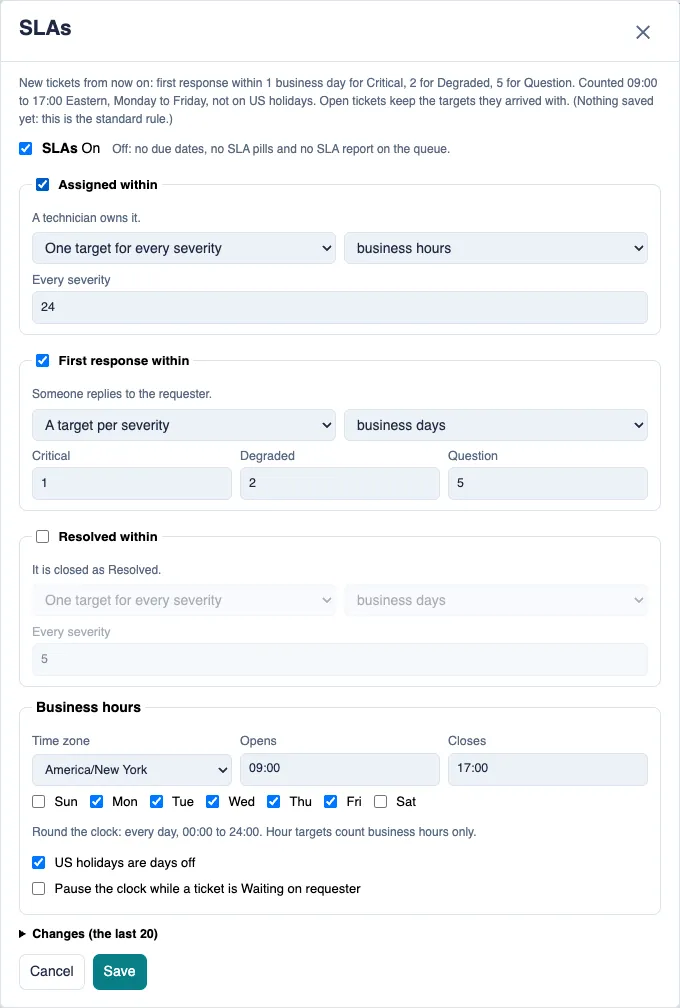
- Select Tools at the right of the toolbar, then SLAs.
- Make sure SLAs at the top is checked (it reads On).
- Check each kind you want to track: Assigned within (a technician owns it), First response within (someone replies) and Resolved within (it is closed as Resolved).
- For each kind you checked, choose One target for every severity or A target per severity, then business hours or business days.
- Type the target in Every severity, or in Critical, Degraded and Question.
- Under Business hours, choose your Time zone, type when your desk Opens and Closes, and check your working days.
- Check or clear US holidays are days off and Pause the clock while a ticket is Waiting on requester.
- Select Save. The message at the bottom of the page sums up what new tickets will get.
Switch SLAs off or on
- Select Tools, then SLAs.
- Check or clear SLAs, then select Save. On Lite, this switch for the standard rule is the only setting.
Tips
- Changes apply to new tickets only. An open ticket keeps the targets it arrived with.
- With SLAs off, the queue shows no due dates, no SLA pills and no SLA report.
- Hour targets count business hours only. For a desk that works round the clock, check every day and set 00:00 to 24:00.
- Open Changes (the last 20) in the SLAs window to see who changed what, and when.
- Any Editor can change the SLAs. Viewers can see the settings but not change them.